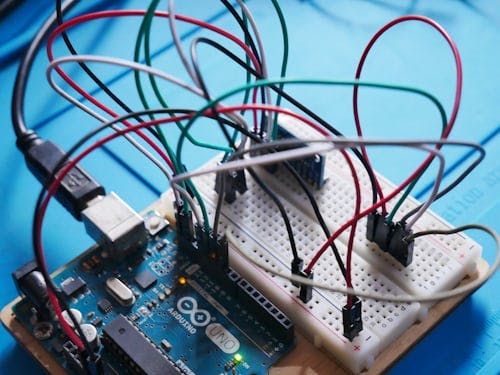
# Programming Arduino: A Beginner's Guide Arduino is an open-source electronics platform based on easy-to-use hardware and software. It's widely popular among hobbyists, students, and professionals for building interactive projects and prototypes. If you're new to Arduino programming, this guide will walk you through the basics of getting started. ## What is Arduino? Arduino consists of a physical programmable circuit board (often referred to as a microcontroller) and a development environment (IDE) that allows you to write and upload code to the board. The microcontroller is the brain of the Arduino, interpreting instructions and controlling connected components like sensors, LEDs, motors, etc. ## Setting Up Your Arduino Environment Before you can start programming, you'll need to set up your Arduino environment: 1. **Download the Arduino IDE:** Visit the [Arduino website](https://www.arduino.cc/en/Main/Software) and download the Integrated Development Environment (IDE) suitable for your operating system. 2. **Install the IDE:** Follow the installation instructions provided on the Arduino website to install the IDE on your computer. 3. **Connect Your Arduino Board:** Plug your Arduino board into your computer using a USB cable. The board should be recognized automatically by your operating system. 4. **Select Your Board:** In the Arduino IDE, go to `Tools > Board` and select the appropriate board you're using (e.g., Arduino Uno, Arduino Nano, etc.). 5. **Choose Your Port:** Also under `Tools`, go to `Port` and select the port to which your Arduino board is connected. On Windows, this will typically be something like `COM3`, and on macOS, it will be `/dev/cu.usbmodemXXXX`. ## Writing Your First Arduino Sketch Now that your environment is set up, it's time to write your first Arduino sketch (program). ```arduino void setup() { // Initialize serial communication at 9600 baud Serial.begin(9600); } void loop() { // Read the value from analog pin A0 int sensorValue = analogRead(A0); // Print the sensor value to the serial monitor Serial.println(sensorValue); // Wait for 500 milliseconds delay(500); } ``` This simple sketch reads an analog input from pin A0, prints the value to the serial monitor, and then waits for half a second before repeating the process. ## Uploading Your Sketch to the Arduino Board Once you've written your sketch, you can upload it to your Arduino board: 1. Verify your sketch by clicking the checkmark icon (or going to `Sketch > Verify/Compile`). 2. If there are no errors, upload your sketch to the board by clicking the arrow icon (or going to `Sketch > Upload`). 3. The IDE will compile your sketch and upload it to the Arduino board. Once uploaded, you should see the onboard LED (usually pin 13) blink rapidly, indicating that the sketch has been successfully uploaded. ## Experimenting Further Now that you've successfully uploaded your first sketch, you can start experimenting with different components and sensors. Arduino provides a vast library of built-in functions and example codes to help you get started with various projects. Here are some resources to explore: - [Arduino Official Website](https://www.arduino.cc/): Official documentation, tutorials, and forums. - [Arduino Project Hub](https://create.arduino.cc/projecthub): A community-driven platform for sharing Arduino projects and tutorials. - [Adafruit Learning System](https://learn.adafruit.com/category/learn-arduino): Tutorials and guides for Arduino projects, ranging from beginner to advanced levels. ## Conclusion Programming Arduino can be an incredibly rewarding experience, whether you're a complete beginner or an experienced electronics enthusiast. With the right resources and a bit of practice, you'll be able to bring your ideas to life and create exciting projects using this versatile platform. So dive in, start experimenting, and let your creativity soar!
.jpg&w=128&q=75)